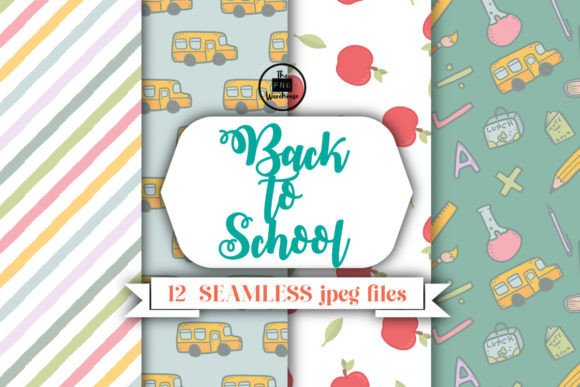
Back to School Papers
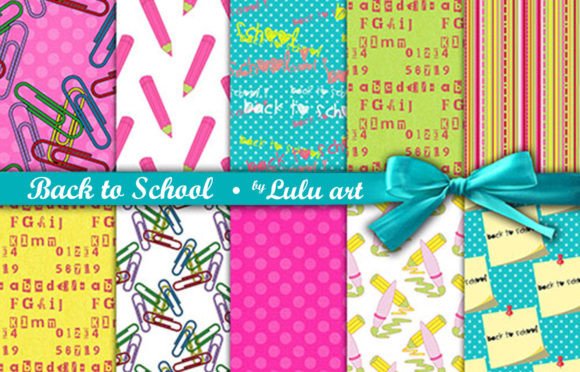
Whether you're designing classroom handouts, launching a seasonal product line, or crafting social media visuals for an education-focused brand, Back to School Papers delivers instant, professional-grade texture and tone—without the paper jam, ink bleed, or shipping delay. These aren’t printable PDFs or generic clipart packs. They’re ten high-resolution, 12 x 12″ digital paper sheets—each saved as a standalone 300 dpi JPEG file—curated for clarity, versatility, and visual cohesion.
What Makes These Digital Papers Stand Out
At first glance, they look like premium printed stationery: subtle grain, soft edges, gentle color variation, and authentic tactile nuance—all captured at true photographic fidelity. But unlike physical paper, these files scale cleanly across devices, layer seamlessly in design software, and retain crispness whether used on a business card or a 24″ presentation slide.
Each JPEG is optimized for real-world use—not just aesthetics. That means no embedded watermarks, no forced transparency (which can cause blending issues in print workflows), and no RGB-to-CMYK surprises. They’re ready for both screen and offset printing, with consistent color profiles that hold up under conversion.
Why Digital Paper Sheets Beat Generic Backgrounds
Most “school-themed” assets online are either cartoonish vector icons or low-res PNGs with jagged edges and inconsistent lighting. Back to School Papers avoids both pitfalls by prioritizing photorealism and functional resolution. You’ll notice how the subtle linen texture interacts with typography—how light catches the faint paper curl in the corner of Sheet #7, or how the warm ivory tone in Sheet #3 complements navy blue text without washing it out.
This level of detail matters when your audience includes educators evaluating materials for student engagement, small-business owners building branded learning kits, or freelance designers pitching back-to-school campaigns to school districts. It signals intentionality—not just decoration.
Real-World Uses Across Roles
- Educators & Curriculum Designers: Use individual sheets as backgrounds for editable Google Slides lesson decks, printable PDF worksheets (even if distributing digitally), or Canva-based parent newsletters—no need to wrestle with background locking or scaling errors.
- Small Business Owners: Layer them beneath product photos for Etsy listings, overlay with custom copy for Instagram Story ads, or embed into email headers for seasonal promotions—especially effective for tutoring services, after-school programs, or educational toy brands.
- Bloggers & Content Creators: Swap out generic blog post dividers for a custom “notebook page” border using Sheet #5’s ruled-line variant—or use Sheet #9’s vintage ledger texture behind quote graphics to reinforce authority and warmth.
- Print-on-Demand Sellers: Combine sheets with original illustrations to create themed planner inserts, teacher appreciation cards, or laminated classroom posters—no licensing headaches, since all files are yours to modify and commercialize.
How to Get the Most From Your ZIP File
The entire set arrives compressed in a single ZIP folder—a standard, lightweight format supported across Windows, macOS, iOS, and Android. To access the files, you’ll need to unzip them first. On most systems, this takes one double-click (macOS) or right-click > “Extract All” (Windows). If you’re using a mobile device, try built-in Files app tools or free utilities like iZip or ZArchiver.
Once unzipped, you’ll see ten clearly labeled JPEGs—named intuitively (e.g., “BackToSchool_Paper04_LinenWarm.jpg”)—so you can preview and select quickly without opening each in Photoshop. No hidden folders, no installer scripts, no subscription layers. Just clean, organized assets you own outright.
Smart Implementation Tips
- Start with contrast testing: Before finalizing a layout, place white and dark text over each sheet to check legibility. Some textures work better with bold sans-serif type; others shine with handwritten-style overlays.
- Respect bleed areas for print: Since each file is exactly 12 x 12″ at 300 dpi, add 0.125″ bleed manually in your layout software if sending to a commercial printer—don’t rely on automatic expansion.
- Batch-edit smartly: In Adobe Lightroom or Affinity Photo, apply uniform brightness or saturation tweaks across all ten files to match your brand palette—then export as new versions to preserve originals.
- Avoid over-layering: These papers already carry visual weight. Pair them with minimal graphic elements—not busy icons or dense patterns—unless intentionally creating a collage effect for a specific campaign.
What to Watch For When Evaluating Digital Papers
Not all “back to school” assets deliver equal value. Watch for telltale signs of low utility: JPEGs saved at 72 dpi (blurry when scaled), inconsistent dimensions (causing layout drift), or mismatched color spaces (RGB vs. CMYK causing hue shifts in print). Also avoid sets where texture dominates so heavily that text becomes hard to read—even at 16pt size.
Back to School Papers sidesteps those issues by design. Every file meets industry standards for hybrid use—screen-first but print-ready—and reflects real classroom materials: aged notebook covers, matte chalkboard surfaces, soft kraft envelopes, and weathered corkboard textures—not stock-photo abstractions.
Final Thought: Tools Should Disappear Into the Work
The best creative resources don’t draw attention to themselves. They support your message, elevate your execution, and disappear into the experience—so your audience focuses on the idea, not the interface. That’s what makes Back to School Papers quietly powerful. It’s not about adding “school vibes.” It’s about grounding your communication in authenticity, consistency, and craft—whether you’re drafting a grant proposal for STEM outreach, designing a welcome packet for new hires, or illustrating a children’s e-book chapter about first-day jitters.
When the tool feels invisible, your voice stays front and center. And that’s where real connection begins.